Partners Contact US Site Map
A professional PDF Converter, PDF Writer, PDF Creator, PDF Editor, HTML Converter, Postscript Converter, AutoCAD DWG Converter, as well as PCL Converter, etc.  

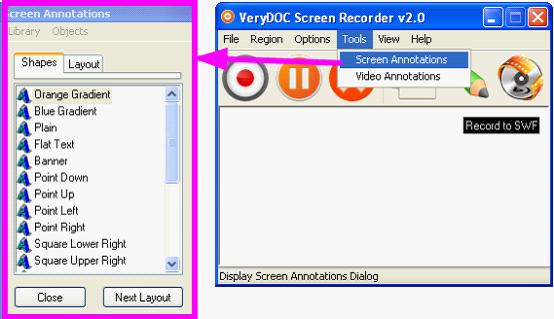
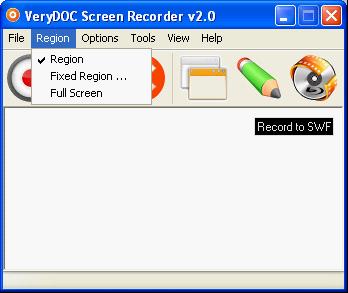
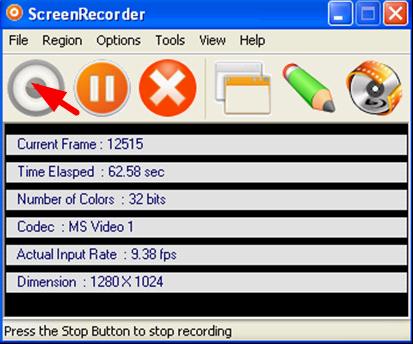
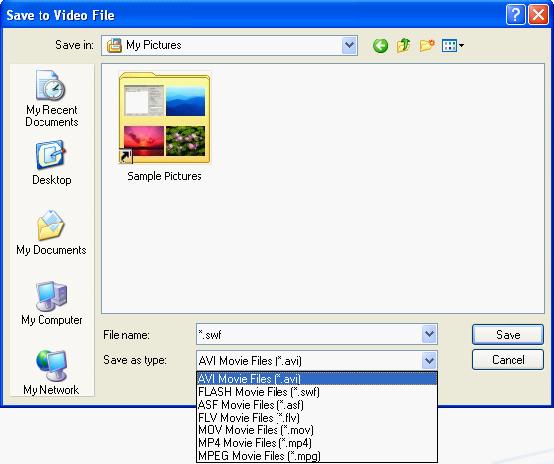
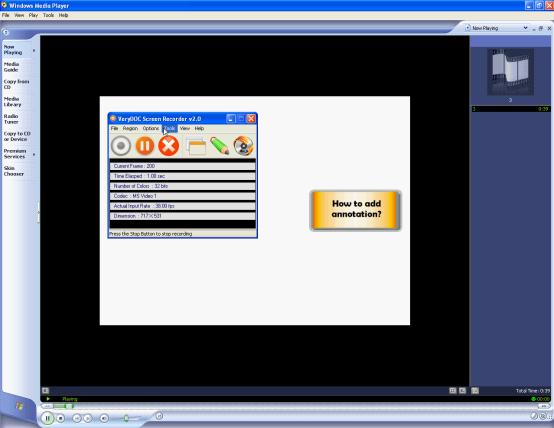
How to record screen and add annotation?

VeryDOC Screen Recorder is a powerful yet simple screen recording software program for Windows which allows you to record desktop activities and create a voice-over presentation with Flash animation effect without any programming skill. When you use VeryDOC Screen Recorder to record screen, you can also add annotation to the video.

The following will introduce how to record screen and add annotation. 6 steps are required.


Step 1: Free Download!
Free download VeryDOC Screen Recorder by clicking here and you will get the 20-times free trial version.
The full version has more functions than the unregistered version. If you want to buy the full version, please click here.


Step 2: Run VeryDOC Screen Recorder
After VeryDOC Screen Recorder has been installed in your computer, you can double click the icon of VeryDOC Screen Recorder to open it. The following illustrated the VeryDOC Screen Recorder window.

The window of VeryDOC Screen Recorder
 
Step 3: Add annotation
  • In order to add annotation, you should
  • Click “Tool” on the top tool bar;
  • Click “Screen Annotations” on the pull down listing to open the “Screen Annotation” dialog box;
  • Select an option in the list control. For instance, select “Orange Gradient” in the control list.
Open the “Screen Annotation” dialog box
 
  • Edit text, when the annotation box appears on the screen. Right click the mouse on the annotation box; > Select “Edit Text” to open the “Text Properties” dialog box; > Edit the text in the edit box, for example, you can change the original text to “How to add annotation?” > Click “Close” to close the “Text Properties” dialog box.
 
Edit the text when add annotation
 

Step 4: Select region
Three options are provided for you to select the recording region on the screen. You can click on “Region” on the top tool bar. Three options are on the pull-down listing:
Region ---- If you want to record any part of the screen. You can keep pressing the left key with the mouse and drag a rectangle of any size on the desktop to select wherever you like to record screen on video.
Fix Region ---- You can preset the region for recording screen on video.
Full Screen---- Can help you record the whole screen, you can select this button. Here we take the last option “Full Screen” as an example.

 
Three options for region selection
 

Step 5: start to record screen
Click the first button, the screen record program will start to record all the activities on your screen.

 
Click the first button to start
 

Step 6: Finish recording screen
Click the third button to stop recording screen. Then, when the “Save to Video File” dialog box appears, you can save the video in a proper format.

  • Select a directory to store the video;
  • Enter a name in the “File Name” edit box;
  • Select the proper output format in the “Save as type” combo box;
  • Click “Save” to close the dialog box.
 
To save the video
 

The following can illustrates the effect of the annotation.

 
The following can illustrates the effect of the annotation.
 
             
  What's Next
             
  Learn more about
VeryDOC Screen Recorder
Take a look at other related products


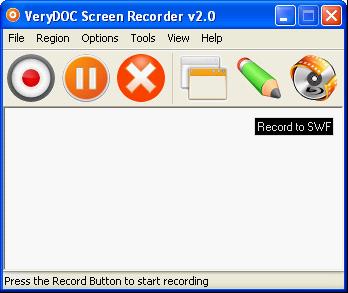
Home | Site Map | VeryPDF.com | VeryPCL.com | Contact
Copyright ©2002-  VeryDOC.com Company. All Rights Reserved.